
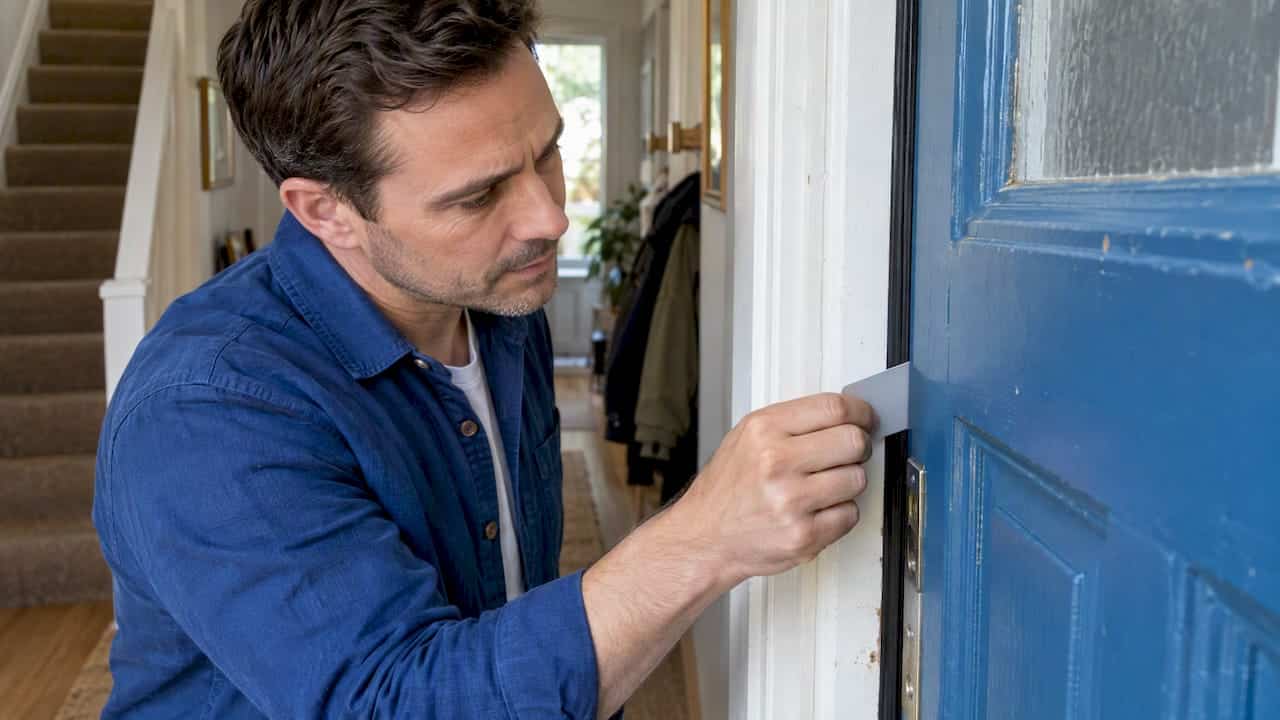
Perimeter weatherstripping fixes to the door frame, while a sweep or brush excluder fits to the bottom of the door or the threshold. Before buying anything, test a 50 mm sample of your chosen strip against the frame and slide a bank card through the gap once the door shuts: comfortable resistance means correct thickness. Interior doors often need an undercut for airflow, so never seal one blindly without checking ventilation needs first.
TL;DR:
- Measure each frame section separately because gaps vary; choose brush or wiper profiles for uneven openings, while compression strips suit consistent gaps.
- Hinged flap sweeps lift over carpet or uneven floors, while brush sweeps suit hard flooring; use a threshold mounted seal for unusually large gaps.
- Clean and dry frames before applying adhesive, avoid stretching the strip, and allow it to cure; use pins or screws on damp or flaking wood.
- Foam strips need replacement every one to two years; inspect seals twice yearly, clean brush profiles, and replace failed sections when the rest remains sound.
- Keep interior door undercuts and combustion air paths clear, especially near open fires, flues, and extractor fans; blocked ventilation can create indoor air quality problems.
Table of Contents
- Types of door weatherstripping and when to use them
- Step-by-step: inspect, measure, test and fit perimeter weatherstripping
- Fitting the door bottom: sweeps, brushes and thresholds
- Measuring gaps and the 50 mm test-piece and bank-card fit test
- Adhesive, surface prep and installation pitfalls to avoid
- When to replace weatherstripping and simple maintenance checks
- UK technical and cost context from Home Energy Model
- Three professional tips on getting draught-proofing right
- Another option: a Home Energy Model assessment or domestic EPC
- FAQ
- Sources
Types of door weatherstripping and when to use them
Choosing the right profile matters more than the brand or price. Each type suits a different gap size and amount of door movement, and picking wrongly means a strip that either fails to seal or stops the door closing properly.
- Self-adhesive foam: cheap and easy to fit, best for small, even gaps on doors used occasionally.
- Compression strips (silicone or EPDM): durable rubber profiles that compress as the door closes, suited to consistent frame gaps on well-used exterior doors.
- Brush or wiper seals: bristles or a flexible fin that flex to accommodate variation, ideal where the door or frame has warped slightly.
- V-strip (tension seal): a folded strip that springs open against the frame, good for sliding sashes and doors with light contact.
- Hinged-flap and brush sweeps: fitted along the door bottom, these drop or brush against the threshold to block draughts without catching on carpet.
Historic England notes that many products only work across a narrow gap range, and a door that has warped can defeat a seal that would otherwise perform well. For variable gaps, a brush or wiper profile adapts better than a fixed compression strip.
Avoid fitting permanent perimeter seals to interior doors that rely on an undercut for ventilation. The Energy Saving Trust recommends temporary excluders for these doors instead, so airflow between rooms is not blocked.
Step-by-step: inspect, measure, test and fit perimeter weatherstripping
Fitting perimeter strip correctly is a short sequence, but skipping a step is the most common reason a seal fails within months.
- Inspect the frame and door for rot, swelling, light showing through gaps, or a door that binds when closing. Repair any damage before fitting a seal, since sealing over a problem rarely solves it.
- Measure each side separately: top, hinge side and latch side often have different gap widths, so record each one rather than assuming they match.
- Cut strips to length for each section individually rather than bending one long piece around a corner, since a single bent strip compresses unevenly and tends to buckle.
- Test thickness before committing: stick a 50 mm sample to the frame at the widest gap point, close the door and try sliding a bank card through. The Centre for Sustainable Energy explains that a card which slides with gentle resistance confirms the right thickness, while one that slides freely means the strip is too thin and one that will not move at all means it is too thick.
- Clean and dry the frame surface, removing any old seal, adhesive residue or dust, since adhesive only bonds well to a sound, clean surface.
- Apply the strip from one end, pressing firmly along its full length without stretching it, which keeps the seal uniform and avoids gaps opening up later.
- Close and open the door several times to check it still operates smoothly, then recheck the bank card test at a few points along each side.
Pro Tip: Fit the head strip last so you can adjust its length against the already-fitted side strips, avoiding an awkward overlap at the corners.
Our step-by-step guide on fitting weatherstripping walks through this test-piece technique in more detail if you want to see the fitting method applied across a full UK door set.
Fitting the door bottom: sweeps, brushes and thresholds
The base of the door loses as much warm air as the sides, so it needs its own solution rather than an extension of the perimeter strip.
- Hinged-flap sweeps drop down as the door closes and lift when it opens, suiting doors over carpet or uneven flooring.
- Brush pile sweeps sit in continuous contact with the threshold, working well on hard flooring where a hinged flap would catch.
- Threshold-mounted seals combine a raised strip with a brush or rubber fin, useful where the gap under the door is larger than a standard sweep can bridge.
Measure the full width of the door bottom, mark the cutting line and trim with a hacksaw for metal-backed sweeps or sharp scissors for brush-only types. Pilot holes stop the screw-fixed types splitting the door edge, and it is worth opening and closing the door a few times after fitting to confirm it still clears the floor. Our guide to installing door seals covers sweep fitting alongside the frame strip if you are doing both in one session.
Measuring gaps and the 50 mm test-piece and bank-card fit test
Gaps rarely run the same width along the whole frame, so measure at the top, both sides and the bottom separately, and note the widest point at each location.
| Measurement point | What to check | Typical finding |
|---|---|---|
| Top of frame | Gap width when door is closed | Often narrower than the sides |
| Hinge side | Gap width, and whether door drags | Usually the tightest gap |
| Latch side | Gap width, light visible through gap | Frequently the widest gap |
| Bottom of door | Clearance above threshold or floor | Varies with flooring type |
Stick a 50 mm offcut of your chosen strip to the frame at the widest point you recorded, close the door fully, then try sliding a bank card through the gap. The Centre for Sustainable Energy confirms that gentle resistance on the card shows correct thickness, a loose card means the strip is too thin, and a card that will not move at all means it is too thick and will strain the hinges. Where gaps vary noticeably between points, a brush or wiper seal will cope better than a fixed-thickness compression strip.
Adhesive, surface prep and installation pitfalls to avoid
Adhesive-backed strips only perform as well as the surface they are stuck to, and rushing this step is the main reason foam strips peel away within weeks.
- Clean and dry the frame thoroughly, removing old adhesive residue, paint flakes and dust before applying anything new.
- Apply the strip without stretching it, pressing firmly along the entire length so there are no unbonded sections.
- Allow the manufacturer’s stated cure time before closing the door repeatedly, since early flexing can lift a fresh bond.
- Switch to mechanical fixings such as pins or screws, or choose a different profile entirely, when the frame surface is damp, flaking or otherwise unsound.
Historic England warns that adhesive will fail on a poor surface regardless of the product quality, so mechanical fixing is the safer choice for long-term durability on older or damp frames.
Pro Tip: Warm the frame slightly with a hairdryer on a cold day before applying adhesive strip; a warmer surface helps the adhesive bond more evenly.
When to replace weatherstripping and simple maintenance checks
Foam strips typically need replacing every one to two years as they compress and lose their shape, while well-fitted silicone or EPDM compression seals and brush strips can last considerably longer with occasional cleaning. Signs it is time to replace a strip include visible gaps, a strip that has gone flat or brittle, or a return of draughts you had previously fixed.
- Check seals twice a year, ideally before winter, running a hand along the frame to feel for cold air.
- Wipe brush and compression seals with a damp cloth to clear dust and grit that can stop them sealing fully.
- Replace a section rather than the whole run where only one area has failed, provided the rest of the strip is still sound.
Typical DIY weatherstripping products for UK homes vary in price depending on material and profile. Where a frame is badly warped or rotten, it is worth calling a professional joiner rather than persisting with DIY fixes.
UK technical and cost context from Home Energy Model
Draught-proofing a door is one of the cheapest ways to reduce heat loss, and it sits alongside the kind of whole-house thinking we cover across our guidance on energy performance. Our page on installing weather stripping in UK homes sets out typical cost brackets for DIY products in more detail, alongside practical fitting notes.
Weatherstripping itself does not directly change an Energy Performance Certificate rating, but it forms part of the broader fabric improvements that a domestic EPC assessment will often flag alongside insulation and glazing. If you are planning several improvements together, it is worth checking our guide on ventilating your home efficiently so sealing draughts does not come at the cost of healthy airflow.
Before buying any product, work through this checklist:
- Inspect the frame and door for damage, rot or misalignment.
- Repair any structural issues before fitting a seal over them.
- Test a 50 mm sample with the bank card method to confirm thickness.
- Measure every gap location separately rather than assuming uniformity.
- Install starting with the perimeter strip, then fit the bottom sweep.
Three professional tips on getting draught-proofing right
Sealing a door is one of the simplest jobs in a home, but a few habits separate a lasting fix from one that needs redoing within a year.
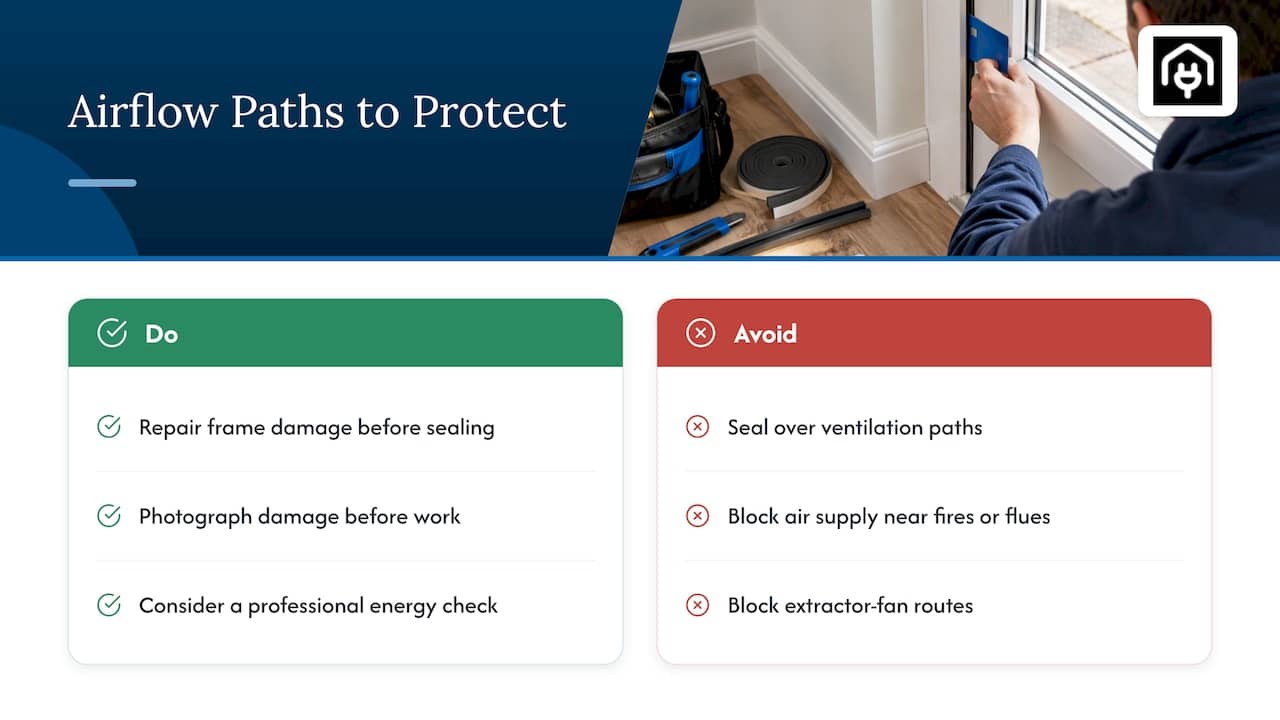
Never seal over a problem you have not repaired. A distorted frame or rotten section will defeat even a well-chosen strip, and sealing over it can trap moisture against timber that needs to breathe. It is worth photographing and noting any damage before you start, both for your own reference and in case you later want a professional quote on repairs.
Simple DIY draught-proofing pairs well with a wider professional energy check. Sealing a door reduces draughts at that one point, but a fuller assessment can identify where the bigger losses are happening across a property. Whichever doors you seal, keep ventilation and combustion-air pathways clear, particularly near open fires, flues or extractor fans, since blocking these can create indoor air-quality problems rather than solving them.
Another option: a Home Energy Model assessment or domestic EPC
DIY draught-proofing solves a specific, visible problem, but it will not tell you how a property performs overall or what else might be worth fixing first. A domestic EPC assessment looks at insulation, heating, glazing and ventilation together, giving a fuller picture than sealing a single door ever could, and it is the route landlords and sellers need regardless of how much DIY work has already been done.
For anyone weighing up a bigger retrofit project rather than a single afternoon with a tube of foam strip, requesting a quote for a domestic EPC assessment is a practical next step. It gives a clear, professional baseline to work from, whether that leads to more draught-proofing, insulation upgrades or a wider energy efficiency plan.
FAQ
What is the proper way to weatherstrip a door?
Fit perimeter strip to the door frame on the hinge side, latch side and top, then fit a sweep or brush excluder to the door bottom. Measure each gap separately, test your chosen strip thickness with a 50 mm sample and a bank card, then clean the surface and apply the strip without stretching it.
How do I properly apply weatherstrip adhesive?
Clean and dry the frame surface fully, removing any old adhesive, paint flakes or dust so the new strip can bond properly. Apply the strip from one end, pressing firmly along its whole length without stretching it, and avoid closing the door repeatedly until the adhesive has cured.
Do you apply weather stripping to the door or door frame?
Perimeter weatherstripping is normally fixed to the door frame, while a sweep or brush excluder attaches to the bottom of the door itself or to the threshold. This split lets the frame-mounted strip compress against the closed door while the separate sweep handles the gap at floor level.
How do I install weather stripping on an interior door?
Interior doors often need a small undercut for ventilation between rooms, so the Energy Saving Trust advises against permanent perimeter seals on these doors. A temporary or removable draught excluder at the bottom is usually the safer choice, keeping airflow intact while still cutting draughts when needed.
Sources
- DIY draught-proofing – Centre for Sustainable Energy
- Draught proofing – Energy Saving Trust
- Energy efficiency and historic buildings: draught-proofing windows and doors – Historic England