

TL;DR:
- A household energy audit identifies where energy escapes and suggests improvements to lower bills and enhance comfort. Both professional and DIY assessments are valuable, with air sealing offering the highest return on investment. Proper preparation and understanding of audit results help homeowners prioritize cost-effective upgrades and improve their property’s energy performance.
Draughts around skirting boards. A cold corner in the spare room. A boiler that seems to run constantly. These are not minor inconveniences. They are symptoms of energy leaving your home unimpeded, and the costs accumulate faster than most homeowners realise. A household energy audit is the structured process that identifies exactly where that energy is going and what to do about it. This guide covers everything from understanding the audit process, preparing for a professional assessment, running your own DIY inspection, and acting on the results to meaningfully reduce your bills and improve home comfort.
Table of Contents
- Key takeaways
- What a household energy audit actually is
- Preparing for a professional energy audit
- What happens during a professional audit
- DIY energy audit guide: a structured approach
- Interpreting audit results and next steps
- My perspective on household energy audits
- How Homeenergymodel supports your next steps
- FAQ
Key takeaways
| Point | Details |
|---|---|
| Audit types vary significantly | Both professional and DIY audits have value; professional assessments use diagnostic tools that uncover issues invisible to the naked eye. |
| Preparation improves outcomes | Collecting past utility bills and documenting comfort problems before an audit helps assessors target the most impactful areas. |
| DIY audits have real value | A thorough DIY inspection can uncover 70–80% of issues found by professionals at virtually no cost. |
| Air sealing delivers the highest return | Sealing large air leaks is consistently the first and most cost-effective improvement after any audit. |
| Audit findings link to EPCs and standards | Understanding audit results helps homeowners align improvements with Energy Performance Certificate ratings and UK compliance requirements. |
What a household energy audit actually is
A household energy audit is a systematic assessment of how energy flows through a home. It identifies where energy is being wasted, what is causing discomfort, and which improvements will deliver the greatest return. The process can be carried out by a certified professional or by a motivated homeowner working through a structured checklist.
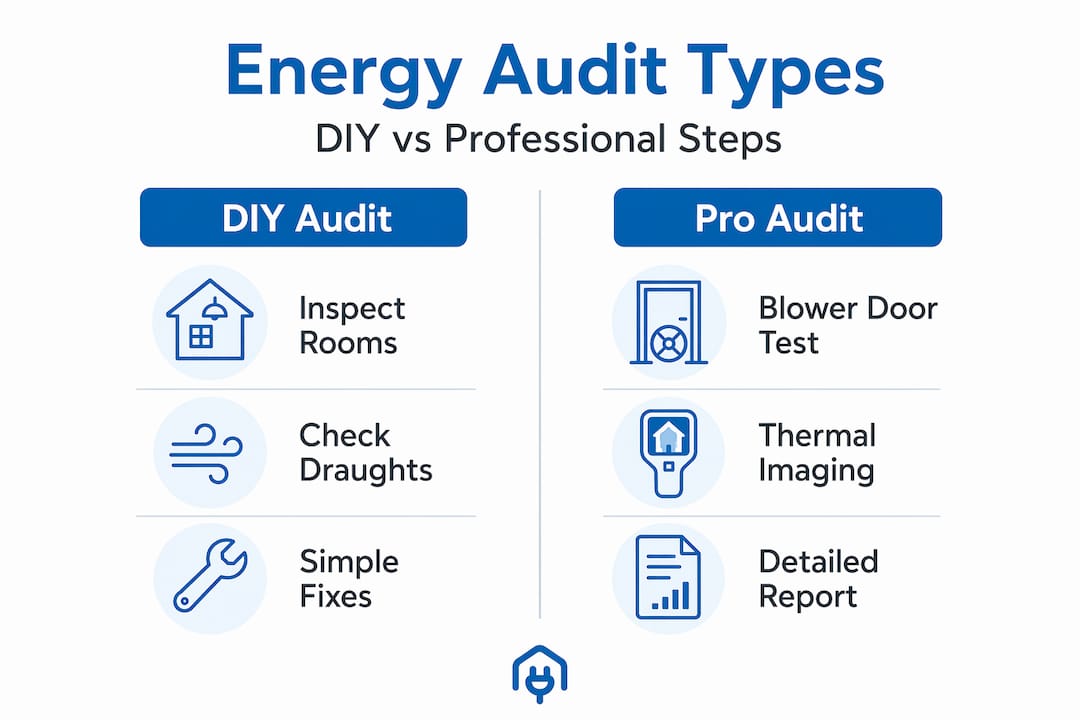
The two main types serve different purposes. A professional audit uses specialist diagnostic equipment and produces a detailed written report with costed recommendations. A DIY energy audit guide approach covers the same ground at surface level, using basic tools and observation to flag the most obvious problems. Both are legitimate starting points, and many homeowners use a DIY inspection to prioritise before commissioning a professional.
Common sources of energy loss in UK homes include:
- Uninsulated or poorly insulated loft spaces, which account for a significant proportion of heat lost in winter
- Gaps around windows, doors, and pipework where air infiltration is constant regardless of heating effort
- Older boilers and heating controls operating well below modern efficiency standards
- Inefficient lighting and appliances, particularly in homes that have not been updated in the past decade
- Poorly sealed chimneys and flues that act as permanent ventilation points even when not in use
Large air leaks such as utility cut-throughs, chimney gaps, and recessed fittings can have an energy loss impact comparable to leaving a window open all year. This is the insight that surprises most homeowners, and it is why audits consistently flag air sealing as the highest-return first step. A home energy analysis does not just find inefficiencies. It ranks them by impact, which is what makes the process genuinely useful rather than a list of obvious suggestions.
Preparing for a professional energy audit
Getting the most from a professional visit requires some groundwork before the assessor arrives. The more context a homeowner can provide, the more targeted the diagnostic testing will be.
- Gather at least 12 months of utility bills. Gas and electricity statements covering a full year give the assessor a baseline and reveal seasonal patterns that point to specific problems. Organise them chronologically and note any periods of unusually high or low usage.
- Document every comfort issue in writing. Homeowners who list problems such as condensation on windows, cold rooms, draughts, or rooms that overheat in summer give assessors the context needed to interpret diagnostic data accurately.
- Note when problems occur. Is condensation worse in the morning or after cooking? Is a room only cold when the wind comes from a particular direction? These details help assessors connect symptoms to causes.
- Make the home accessible. Clear access to the loft hatch, boiler cupboard, any crawl spaces, and all external walls. An assessor who cannot inspect an area cannot assess it.
- Find a certified energy assessor. Scheduling through utility providers or official energy offices increases the likelihood of finding a qualified professional. In the UK, look for assessors registered with an accredited scheme.
Pro Tip: Note whether specific rooms feel uncomfortable at particular times of day rather than just describing them as “cold” or “draughty”. This precision helps the assessor correlate your experience with diagnostic results, particularly during blower door testing.
What happens during a professional audit
A professional home energy assessment is not a quick walk around with a clipboard. It is a methodical process that typically takes between two and four hours, depending on property size.
The assessor carries out a room-by-room inspection, examining insulation levels, window glazing, draught sealing, heating controls, lighting, and appliance age. They review utility bills alongside physical findings to identify patterns. Then the specialist diagnostic work begins.
The two most revealing tools are:
| Diagnostic tool | What it does | What it finds |
|---|---|---|
| Blower door test | Depressurises the home using a fan mounted in a doorframe | Measures total air leakage and locates specific leak points |
| Thermographic (infrared) scan | Uses a thermal camera to capture heat distribution across surfaces | Reveals insulation gaps, thermal bridges, and hidden moisture |
A blower door combined with an infrared scan provides the most useful diagnostics when the home is in its typical occupancy condition. Assessors correlate this data with the homeowner’s reported experiences to prioritise fixes. A cold wall that appears fine visually may show clear heat loss on an infrared image. That is information no visual inspection alone can produce.
The assessor may also test:
- Heating system efficiency, using combustion analysers to check boiler output
- Duct integrity, particularly in homes with ducted air systems
- Ventilation rates, to balance energy loss against indoor air quality requirements
The session ends with the assessor walking the homeowner through their preliminary findings. A written report follows, detailing each finding, its estimated energy and cost impact, and specific recommendations ranked by priority. That report is the foundation for every improvement decision that follows.
DIY energy audit guide: a structured approach
DIY audits can uncover 70–80% of issues found by professional assessments, at virtually no cost. The key is following a structured process rather than looking around and hoping something obvious stands out.
Tools to gather before starting:
A torch, a tape measure, an incense stick or thin piece of tissue paper for detecting air movement, and a plug-in energy monitor such as a Kill-A-Watt meter for measuring appliance consumption. That is all that is required.
- Start outside. Walk the entire exterior perimeter and look for gaps where different building materials meet: where brick meets timber, around window frames, at the base of walls, around external pipes and cables. Mark anything that needs attention.
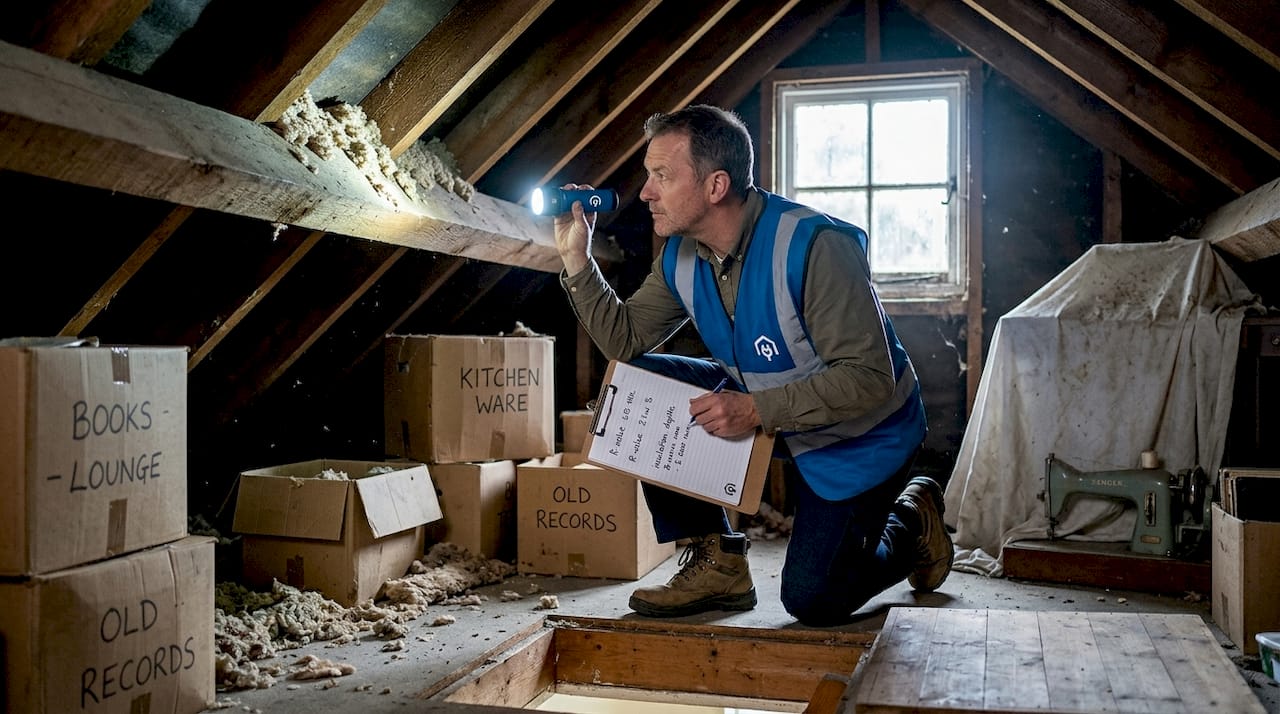
- Inspect the loft. Check insulation depth with a tape measure. Current UK guidance recommends 270mm of mineral wool. Anything below 100mm is a priority improvement. Look for gaps around loft hatches, pipes, and electrical fittings.
- Check every external door and window. Hold the incense stick near frames, hinges, and letter boxes. Any movement in the smoke indicates air infiltration. Pay particular attention to older timber frames and single-glazed units.
- Examine the heating system. Check the boiler installation date, note the control system, and assess whether thermostatic radiator valves are fitted throughout. An uncontrolled spare room radiator running at full output is a common and easily fixed waste source.
- Audit appliance loads. Plug the energy monitor into sockets serving televisions, gaming consoles, and older white goods. Replacing dirty HVAC filters can reduce energy consumption by 5–15%. Older appliances drawing high standby loads are often worth replacing.
Pro Tip: Do the draught test on a windy day with all windows and internal doors closed. Wind pressure amplifies air infiltration, making leaks far easier to detect with an incense stick than on a still day.
The honest limitation of a DIY audit is that it cannot quantify leakage with the precision of a blower door test, and it cannot see through walls. If the DIY process reveals significant problems or results feel inconclusive, a professional assessment is the logical next step. Explore a detailed home energy audit checklist to guide a more thorough self-assessment.
Interpreting audit results and next steps
An audit report is only useful if the findings are translated into prioritised action. Understanding how to read the recommendations is the bridge between the assessment and actual improvement.
Audit reports typically list recommendations across several categories, usually ranked by cost-effectiveness:
- Air sealing and draught-proofing: consistently the highest return, lowest cost intervention regardless of home type or age
- Loft and wall insulation upgrades: significant savings potential, with various government support schemes available in the UK
- Boiler replacement or heating controls: particularly relevant in homes with equipment older than 15 years
- Smart heating technology: programmable and zone-controlled systems that prevent heating unoccupied spaces
- Lighting and appliance replacement: often lower priority unless appliances are very old or in constant use
| Improvement type | Typical payback period | Average annual saving |
|---|---|---|
| Draught-proofing | Under 1 year | £50–£100 |
| Loft insulation top-up | 2–4 years | £150–£250 |
| Smart thermostat | 1–2 years | £75–£150 |
| Boiler replacement | 5–10 years | £200–£400 |
Energy audit recommendations frequently connect to rebates and utility incentives, and some programmes include installing upgrades during the assessment visit itself. In the UK, schemes such as the Great British Insulation Scheme and ECO4 have linked audit findings to funded improvements for eligible households. Confirming eligibility before committing to private expenditure is always worth the effort.
Audit findings also feed directly into a property’s Energy Performance Certificate rating. Understanding how audit outcomes affect EPC ratings is particularly relevant for landlords and those planning to sell, given the direction of minimum EPC standards in England and Wales.
My perspective on household energy audits
I’ve seen homeowners go through the motions of an audit and then spend money in the wrong order. They replace perfectly adequate double glazing while leaving a loft with 50mm of compacted insulation and gaps around every ceiling fitting. The audit report told them to address the loft first. They ignored it because new windows felt like a more visible improvement.
The purpose of a thorough home energy audit process is to replace intuition with evidence. What I’ve found consistently is that homeowners trust the assessment more when they were actively involved in it. The ones who walked through the blower door test, saw their smoke pencils flickering at the skirting boards, and watched the infrared images build in real time. Those homeowners acted on their reports. The ones who simply received a PDF months later rarely did.
My other observation is that DIY audits are underrated, not as a substitute for professional assessments, but as a way of building the understanding needed to act on professional findings. A homeowner who has already walked their loft with a tape measure and found 80mm of old mineral wool understands immediately why the report recommends an upgrade. That understanding accelerates action.
The uncomfortable truth is that most homes in the UK have straightforward, affordable improvements sitting unaddressed because no one has systematically documented them. A household energy audit does that. The rest is just deciding to start.
— Danny
How Homeenergymodel supports your next steps
Homeenergymodel provides practical, UK-focused guidance on energy performance for homeowners, landlords, and property professionals. Whether you are preparing for a professional assessment or trying to understand how audit findings affect your property’s EPC rating, the site offers clear, well-structured resources to help.
The Home Energy Model explained guide covers how the new government methodology replacing SAP will change the way home energy performance is measured and what that means for audit outcomes and EPC ratings. For landlords and property investors, the types of home energy models page sets out the different assessment frameworks and when each applies. Alongside these resources, energy efficient home upgrades gives a practical breakdown of improvements most commonly recommended after audits, with guidance on what to prioritise.
FAQ
What is a household energy audit?
A household energy audit is a structured assessment of a home’s energy use, identifying where energy is wasted and recommending prioritised improvements. It can be carried out by a certified professional using diagnostic tools or by the homeowner using a structured DIY checklist.
How much does a professional home energy audit cost?
Professional audits typically cost between £150 and £500 in the UK, though some programmes offer free in-home assessments through utility providers or government schemes for eligible households.
What is a blower door test and why does it matter?
A blower door test depressurises the home to measure total air leakage and locate specific draught sources. Combined with an infrared scan, it provides the most precise diagnostic picture of where a home is losing energy.
Can a DIY audit replace a professional assessment?
A DIY audit can uncover the majority of common issues and is a useful starting point, but it cannot replicate the precision of blower door testing or infrared imaging. For older properties or those with significant comfort problems, a professional assessment will deliver more detail and more confidence in the findings.
How do audit results relate to Energy Performance Certificates?
Audit findings directly inform the improvements needed to raise a property’s EPC rating. In the UK, minimum EPC standards for rental properties are being tightened, making audit-driven upgrades relevant not only for comfort and cost savings but also for regulatory compliance.