
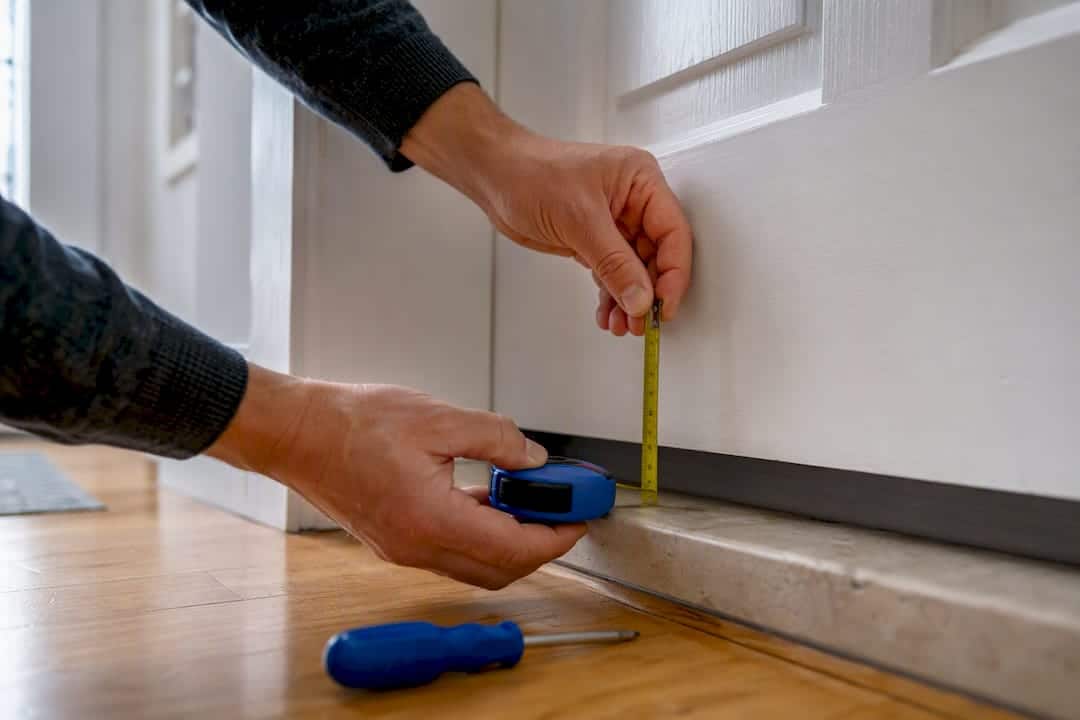
For most exterior doors, the fix is a screw-on sweep or a slide-on U-shaped seal sized to that specific door. Measure the width, the thickness, and the largest gap at three points along the base before buying anything. Uneven thresholds or high-traffic doors usually do better with a brush strip or an automatic door bottom instead.
TL;DR:
- The most effective seals for DIY installation are screw-on sweeps for level thresholds and slide-on U-shaped seals for nearby matching door thickness, with measurement accuracy being crucial.
- Accurate measurement involves taking the full door width, thickness, and the largest gap at multiple points, then matching the seal type and size accordingly to avoid premature replacement.
- Automatic door bottoms and threshold-mounted seals are best suited for doors with heavy use, uneven floors, or exposure to rain, and require careful adjustment for proper gasket contact.
- When replacing weather stripping, remove old materials completely, clean the surface, and test fit with paper before final installation to ensure a proper seal.
- Persistent draughts or seal failures often indicate issues with the threshold or door alignment rather than the seal itself, and professional assessment may be needed for complex problems.
Table of Contents
- How to change weather stripping on the bottom of a door: tools and materials
- Choosing the right bottom seal for your door
- How do you measure a door for a new bottom seal?
- Removing the old weather stripping
- Installing a screw-on sweep step by step
- Fitting a slide-on U-shaped seal or door shoe
- Installing an automatic door bottom
- How do you test a new door seal for fit?
- Common problems and how to fix them
- Maintenance and knowing when to replace weather stripping again
- Why sealing your door bottom matters for your home’s energy performance
- A practical note on getting this right first time
- When it’s worth calling in a professional assessment
- Sources
- FAQ
How to change weather stripping on the bottom of a door: tools and materials
Before removing anything, gather what the job actually needs. Most of these items sit in a standard toolbox already.
- Tape measure (metric and imperial markings help, since seals are sold in both)
- Pencil and a combination square for straight cutting lines
- Drill with pilot bits, or a screwdriver for pre-drilled carriers
- Hacksaw or a metal-cutting blade for aluminium carriers
- Utility knife for trimming vinyl or rubber fins
- Safety glasses, since cutting aluminium throws off sharp filings
Materials depend on the seal type chosen. A screw-on sweep pairs an aluminium carrier with a vinyl or EPDM fin. A slide-on seal is a U-shaped channel that wraps the door bottom. Automatic door bottoms use a spring-loaded mechanism, and threshold-mounted seals sit on the floor rather than the door itself. Brush inserts suit uneven or worn thresholds.
Clear the work area, lay down an old towel to protect flooring, and keep removed screws in a small dish. Losing them mid-job is a common, avoidable delay.
Choosing the right bottom seal for your door
The wrong seal type is the single biggest reason DIY weather stripping jobs go wrong. Get this decision right and installation becomes straightforward.
A screw-on sweep suits a level threshold and is the easiest option for a first-time DIYer. It mounts to the face of the door with slotted screw holes, which makes height adjustment simple after fitting. The trade-off is a slightly more visible fitting on the door’s exterior face.
A slide-on U-shaped seal, sometimes called a door shoe, wraps around the bottom edge of the door for a tidier finish. It needs to closely match the door’s thickness, so accurate measurement matters more here than with a screw-on version.
Automatic door bottoms and threshold-mounted seals earn their place on doors with heavy daily use, uneven floors, or exposure to driving rain. A threshold-mounted system pairs well with these because it seals from below rather than relying purely on the door’s edge.
Material choice affects how long the fix lasts. Vinyl is cheap and fine for low-traffic internal doors, but it hardens and cracks faster in cold weather. EPDM and silicone stay flexible for longer and resist splitting through winter. For a threshold that dips or slopes, a brush sweep conforms to the irregularity in a way a rigid vinyl fin cannot.
Pro Tip: If your front door sees rain driving in from one direction, prioritise a threshold-mounted seal or door shoe over a basic screw-on sweep, even if it costs a little more upfront.
How do you measure a door for a new bottom seal?
Getting the numbers right before you buy avoids a wasted trip back to the shop. Work through this in order:
- Measure the full width of the door across the bottom edge, including any overhang past the frame.
- Measure the door’s thickness at the bottom edge, since slide-on seals and door shoes must match this closely.
- Measure the gap between the door and the threshold at three points: near the hinge side, in the middle, and near the latch side.
- Use the largest of those three gap measurements to size the seal, not the smallest. A seal fitted to the smallest gap will drag everywhere else.
- Check whether the door already has a kerf, a thin routed channel along the bottom edge, and measure the kerf’s width and depth if a slide-on seal is going into it.
- Decide whether the door needs to come off its hinges. Door shoes and some retrofit kerf-in seals often require removal or trimming to fit properly.
Write these figures down and take them with you when buying. Sizing against the largest gap rather than an average is what separates a seal that works from one that needs replacing again in a month.
Removing the old weather stripping
Removal method depends entirely on what’s currently fitted.
- For a screw-on sweep, back out the screws and slide the aluminium carrier free. Keep the screws if the holes still line up with the new part.
- For a slide-on seal, pull the strip out of its channel. If age has made it brittle, cut it into short sections first rather than fighting one long, crumbling piece.
- For adhesive-only strips, warm the material gently with a heat gun or hairdryer to loosen the bond, then peel it away and clean any leftover residue with a suitable solvent.
- Wipe the door bottom and threshold clean before fitting anything new. Old adhesive or grit left behind stops a new seal from sitting flush.
- If a door shoe or heavy retrofit seal is going in, plan to remove the door from its hinges. Support the door’s weight, tap out the hinge pins from the bottom up, and set the door somewhere stable and flat to work on.
Installing a screw-on sweep step by step
This is the quickest fix for most homeowners and rarely takes more than an hour.
- Measure the door width again at the point where the sweep will sit, then mark the aluminium carrier to length.
- Cut the carrier with a hacksaw and file or sand the cut edge to remove sharp burrs.
- Hold the sweep against the door so the vinyl or EPDM fin just brushes the threshold, then mark through the slotted screw holes.
- Drill pilot holes at your marks, sized slightly smaller than the screws to keep them from stripping the aluminium.
- Fit the screws at both ends first, leaving them slightly loose, then test the door for smooth closing.
- Slide the sweep up or down within the slotted holes until the fin makes light, even contact along its full width, then tighten every screw.
- Run a hand along the base with the door closed to feel for gaps or uneven pressure, adjusting again if one end sits higher than the other.
Avoid overtightening. A sweep pulled in too tight against the threshold will drag and wear out far faster than one set to brush lightly.
Fitting a slide-on U-shaped seal or door shoe
This method gives a tidier finish but usually asks more of you upfront in terms of measurement accuracy.
- Confirm the door’s thickness matches the seal’s rated range, since a slide-on channel that’s too loose or too tight won’t seat properly.
- Slide the U-shaped seal onto the door bottom, trimming the metal channel with a hacksaw so it sits flush at both edges.
- If a full door shoe is being fitted and the door must come off, support it securely and remove the hinge pins from bottom to top.
- With the door off, trim the bottom edge if needed, typically by no more than a quarter of an inch, to allow clearance for the shoe’s profile.
- Fit the shoe onto the trimmed edge, then rehang the door by reversing the hinge pin removal, top pin first.
- Close the door and check the fin compresses evenly across the full width while still allowing the door to swing open without catching.
- Where only the rubber insert has worn out and the channel itself is sound, buy a replacement insert rather than an entirely new shoe.
Installing an automatic door bottom
An automatic door bottom lifts clear of the floor when the door opens and drops a gasket down against the threshold when it closes, which makes it a strong choice for doors that see heavy daily traffic.
- Position the unit on the door face so its plunger will strike the door frame at the correct point when the door swings shut.
- Measure and cut the unit to the door’s width, then mark and drill the mounting holes.
- Screw the mechanism into place, keeping it level along the bottom edge.
- Close the door slowly and check the gasket drops fully to meet the threshold; open it and confirm the gasket lifts clear before it drags.
- If the drop timing is off, adjust the plunger’s strike point or reposition the strike plate on the frame slightly.
- Test the latch several times to confirm it still engages properly and the door doesn’t bind against the frame during the swing.
Surface-mounted units like this suit most retrofit jobs without any carpentry. Morticed automatic bottoms sit flush within a routed recess in the door itself, which looks neater but demands more precise joinery and is usually a job for someone experienced with a router.
Pro Tip: Test the automatic door bottom a dozen times before calling the job done. A unit that works once but sticks on the fifth or sixth close will only get worse with daily use.
How do you test a new door seal for fit?
A properly fitted seal should stop light and draughts without fighting the door on every close.
- Close the door on a strip of paper or a banknote at several points along the width, then pull it out. Light resistance without tearing means a good fit; if it slides out freely, the seal needs raising.
- Check for visible light at the base with the door closed and the room behind you dark, moving a torch along outside if needed.
- On a breezy day, run a hand slowly along the door bottom feeling for cold air, or listen for a faint whistle, which usually points to a small gap rather than a full seal failure.
- Open and close the door several times to confirm it swings freely, the latch still engages, and any carpet underneath isn’t catching.
- If problems persist after adjustment, the threshold itself may be the issue rather than the seal, and a different seal type or a professional look might be worth it.
Common problems and how to fix them
Most weather stripping complaints trace back to one of four fixable issues.
- Dragging or scraping seal: raise the sweep slightly within its slotted holes, or switch to a brush strip or automatic door bottom if the threshold itself is uneven.
- Uneven contact along the width: this usually points to the threshold or the door itself sitting slightly out of level, not the seal. A threshold-mounted seal can compensate where the door can’t be adjusted.
- Adhesive strip won’t stay stuck: daily use tends to peel adhesive-only strips off within months. Switch to a mechanical fixing, a screw-on sweep or a slide-on channel, for anything that gets used more than a handful of times a day.
- Gaps at the corners: trim the seal so it meets the jamb weather stripping cleanly, and add a supplementary threshold or jamb seal if a gap persists after trimming.
Pro Tip: If you’ve replaced the seal twice in two years and it keeps failing the same way, the problem is very likely the threshold or the door’s alignment, not the seal itself.
Maintenance and knowing when to replace weather stripping again
A quick check twice a year, and again just before winter, catches most problems before they cost you on heating.
- Look for hardening, visible cracks, flattened fins, light showing through, or water marks on the floor just inside the door.
- Vinyl seals typically last around one to three years before they harden and split, while EPDM or silicone versions can run anywhere from three to ten years depending on exposure. Brush inserts wear out based on foot traffic rather than age.
- Basic upkeep is simple: wipe the seal clean, retighten any loose mounting screws, and swap worn inserts rather than the whole carrier where the design allows it.
- If air leakage seems widespread across several doors and windows, or the threshold itself has warped or sunk, that’s a sign the issue has moved beyond a straightforward seal swap and a professional look is worth arranging.
Why sealing your door bottom matters for your home’s energy performance
The gap under an exterior door is one of the more overlooked sources of uncontrolled air leakage in a typical home, and it feeds directly into how a property’s overall energy performance is assessed.
- A well-fitted door bottom seal reduces draughts that otherwise force heating systems to work harder to maintain temperature.
- This kind of air leakage is exactly what assessors account for when calculating a building’s air tightness, a factor that feeds into wider energy efficiency scoring.
- Pairing a bottom seal with proper window draught proofing tackles the building envelope as a whole rather than one weak point at a time.
- Brush strips and weather bars are a sound choice for reducing heat loss on external doors, though the Gas Safe Register cautions against blocking ventilation that’s required near gas appliances.
- If DIY sealing hasn’t resolved persistent draughts or you’re planning wider retrofit work, a formal domestic energy performance assessment gives a clearer picture of where heat is escaping.
A practical note on getting this right first time
Measure first, buy second. That order sounds obvious written down, but it’s the single step most DIYers skip, and it’s the reason so many bottom seals end up returned or refitted within weeks. A screw-on sweep or slide-on U-shaped seal covers the vast majority of front and back doors in typical UK homes, and both are forgiving enough for a first attempt if the measurements are right.
Keep a simple checklist to hand: measure width, thickness, and the gap at hinge, middle, and latch. Buy the seal type that matches your threshold and traffic level. Remove the old strip fully and clean the surface. Fit the new seal, then test it with paper at several points before calling it finished. Follow that order and the job holds up for years, not months.
— Danny
When it’s worth calling in a professional assessment
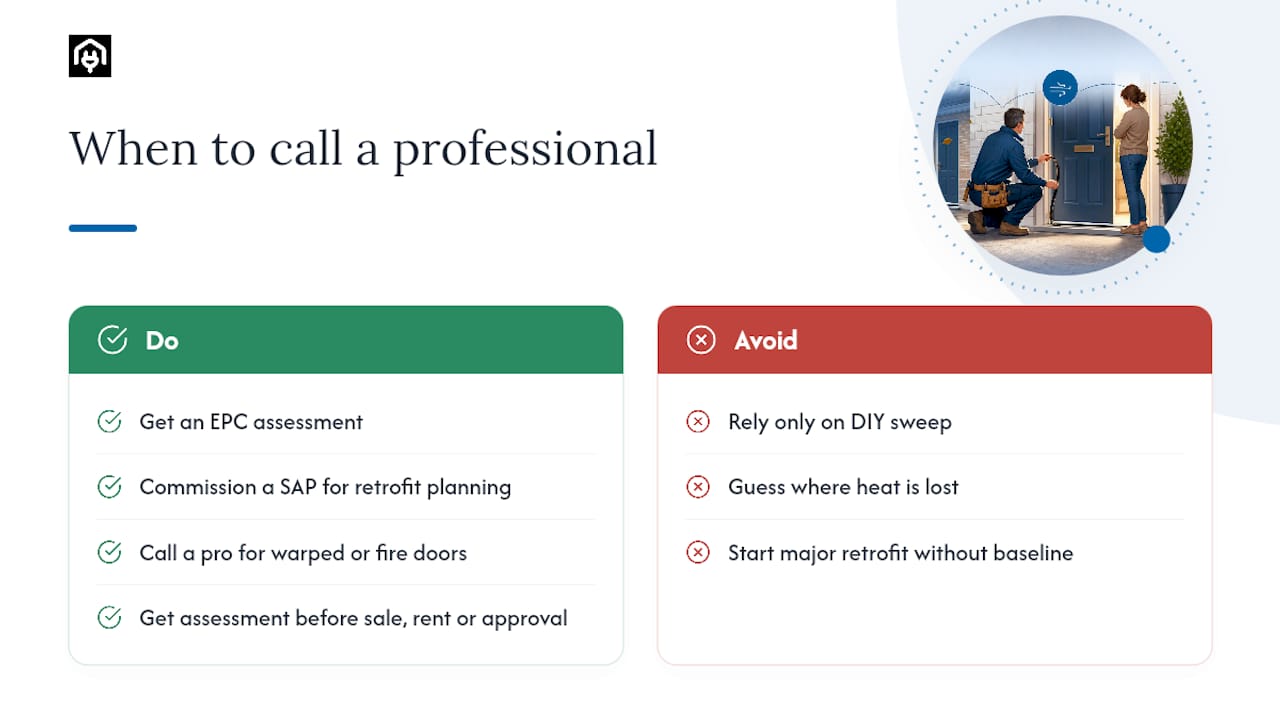
DIY weather stripping handles the vast majority of draughty doors, but some situations sit outside what a screw-on sweep or slide-on seal can fix. A threshold that’s badly warped, a fire-rated or high-security door with specific sealing requirements, or draughts that persist across several doors and windows despite a proper fit are all signs the issue runs deeper than the door bottom alone.
That’s where a Domestic Energy Performance Certificate earns its keep. An EPC assessment identifies where a property is genuinely losing heat, rather than guessing room by room, and gives landlords and homeowners a documented baseline before committing to bigger retrofit work. For anyone weighing up a wider upgrade, a SAP calculation provides the technical detail needed to plan improvements that actually move the needle on a property’s energy rating.
If your afternoon of DIY sealing turns up more draughts than expected, or you’re preparing a property for sale, rental, or planning approval, consider getting a formal energy assessment to obtain a clear, documented view of where the building envelope needs attention next.
Sources
The measurement and product guidance above draws on established fitting practice from Doors For Pros on matching seal type to threshold condition, and from GarageDoorZone on measuring at three points before buying. Fitting steps for screw-on and slide-on seals follow guidance from DG Floors, while advice on brush strips and automatic bottoms for uneven thresholds comes from Perfect Windows and Siding. For readers considering an in-depth door seal installation guide, that resource covers automatic bottoms and threshold systems in further detail.
- Door Weatherstripping Types: Choosing the Right Seals for Each Door | Doors For Pros
- Bottom garage door seal — Measuring and buying tips | GarageDoorZone
- Exterior metal door bottom seal replacement | Perfect Windows and Siding
FAQ
How do you replace weather stripping on the bottom of a door?
Measure the door’s width, thickness, and the gap at hinge, middle, and latch, then buy a seal sized to the largest gap. Remove the old strip, clean the surface, and fit a screw-on sweep or slide-on seal, testing with a paper strip before finishing.
Can I replace a door sweep without removing the door?
Yes, a screw-on sweep can usually be fitted and adjusted with the door still on its hinges. Slide-on seals and door shoes are more likely to need the door removed, especially if trimming the bottom edge is required.
My weather stripping is coming loose. How can I fix it?
Peeling is common with adhesive-only strips, particularly on doors used several times a day. Switch to a mechanical fixing, either a screw-on sweep or a slide-on channel, for a fix that holds up under daily use.
How do you seal the gap at the bottom of a door?
Fit a screw-on sweep or slide-on U-shaped seal sized to your largest measured gap for a level threshold, or choose a threshold-mounted seal, door shoe, or automatic door bottom where the floor is uneven or water ingress is a concern. If leaks persist across multiple doors, a domestic EPC assessment can pinpoint where the wider air leakage is coming from.