
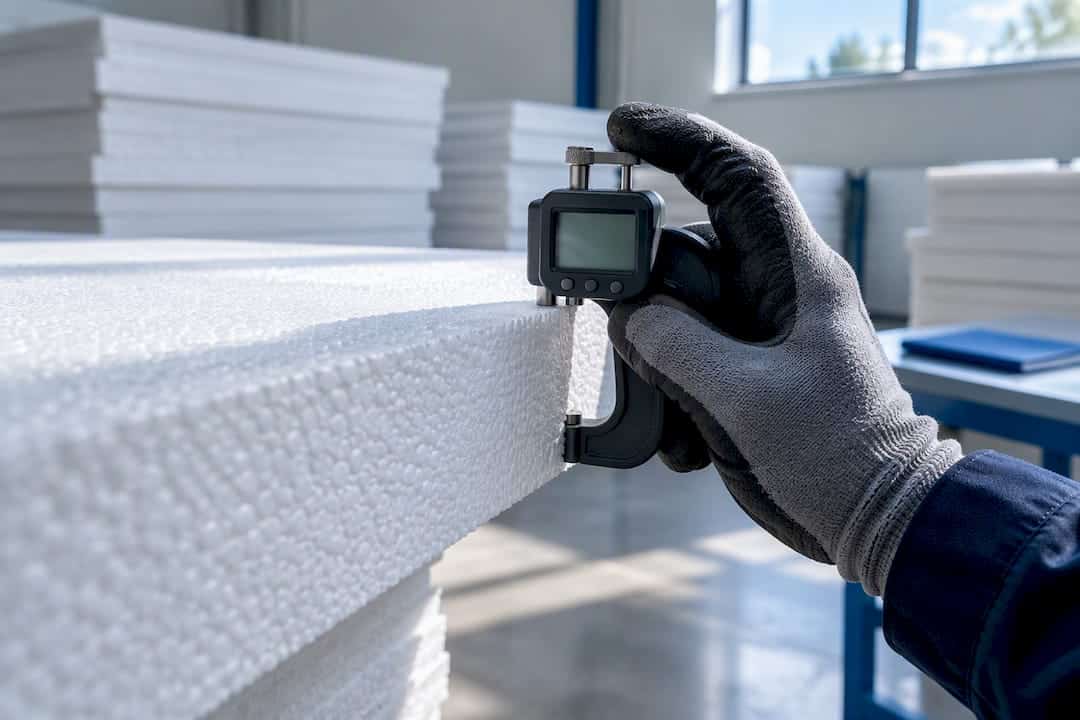
Expanded polystyrene insulation board is a practical, cost-effective choice for external wall insulation, ground floors and some flat roof builds, and it remains one of the most widely specified materials in UK retrofit work under standards such as BS EN 13163 and Approved Document L. The main caveats are fire performance, which demands proper encapsulation, and installation detailing, where gaps or poor fixing can let moisture in or create thermal bridges that undercut the board’s rated performance.
TL;DR:
- EPS70 is typically suitable for external wall insulation, while EPS100 is recommended for areas requiring higher compressive strength, such as under floors.
- Ensuring full encapsulation and continuous junction detailing during installation is crucial to prevent thermal bridges and moisture ingress that can compromise insulation performance.
- Check the declared lambda value on datasheets and confirm the product’s compliance with BS EN 13163 to ensure it meets thermal and safety standards.
- EPS is most effective in render-finished external wall systems, ground floors, and cavity infill assemblies, but unsuitable for ventilated or breathable wall finishes.
- Proper calculation of board thickness and lambda in energy models is essential to achieve the targeted EPC improvements and comply with Part L regulations.
Table of Contents
- What expanded polystyrene is and how it is made
- Specifications, grades and pack sizes you need to know
- How thermal performance translates from board to building
- Where EPS boards work best on a project
- Installation detailing that protects long-term performance
- Environmental and lifecycle considerations worth weighing
- Buying checklist: what to verify before you order
- How EPS choices affect Home Energy Model and EPC outcomes
- Why builders still reach for EPS, and when they do not
- How Home Energy Model can help you verify the result
- Sources
- FAQ
What expanded polystyrene is and how it is made
Expanded polystyrene, commonly shortened to EPS, starts as small polystyrene beads that are expanded with steam and fused together under heat and pressure into rigid blocks. Those blocks are then cut into boards of the required thickness. The finished material is a closed-cell foam, and it is that cell structure, not the plastic itself, that gives EPS its insulating property: each cell traps a pocket of still air that resists heat flow.
Density and grade determine what a board is fit for.
- Lower-density boards suit non-structural applications such as loft floor insulation.
- Higher-density grades carry greater compressive strength and suit floors, render carrier systems and areas that take foot traffic or load.
- The BEIS SWI report names EPS as one of the four materials commonly used in UK wall insulation retrofit, largely on the strength of cost and availability.
Specifications, grades and pack sizes you need to know
Boards are typically sold in dimensions such as 1200 x 2400mm, though smaller formats exist for domestic loft and floor work. Pack coverage is calculated from the board dimensions and the number of boards per pack, so checking both figures against the area to be covered avoids ordering shortfalls or expensive overage.
- Check the grade against the load. EPS70 is the standard choice for general external wall insulation, while EPS100 suits areas needing higher compressive strength, such as under floor screeds.
- Read the declared lambda value. This is the thermal conductivity figure on the datasheet, and it drives any U-value calculation for the build-up.
- Confirm the density. Density is usually printed alongside the grade code and gives a quick check that the board matches the compressive strength quoted.
- Match the thickness to the design. Datasheets list available thicknesses, and the design should specify the exact figure rather than “nearest available”.
How thermal performance translates from board to building
EPS typically has a thermal conductivity in a range depending on grade and density, and that lambda value is the starting point for any U-value calculation for a wall, floor or roof build-up. A lower lambda means better performance per millimetre of thickness, so two boards with different densities may need different thicknesses to hit the same target.
- Thicker boards generally give lower U-values, but the relationship is not linear once other layers in the build-up are accounted for.
- Continuous insulation across a junction matters as much as raw thickness.
- Retrofit and new build targets vary by element and project, so thickness should be checked against the specific design rather than a rule of thumb.
One of the most consistent findings in UK compliance guidance is that junction detailing, not board thickness, decides whether a wall upgrade performs as designed, according to NHBC’s guidance on masonry construction. Approved Document L reinforces this by setting out how insulation continuity and limiting thermal bridging both count toward Part L compliance, not thickness alone.
Where EPS boards work best on a project
EPS is the standard choice for external wall insulation finished with render, where the board sits behind a mechanically fixed and adhesive-bonded render system. It performs well under ground-bearing floor slabs, where its compressive strength and moisture resistance suit a level, compacted base, and it appears in some flat roof and cavity infill assemblies.
- External wall insulation with render: the most common EPS application, provided the render system and fixings match the manufacturer’s certificate.
- Ground floors: EPS handles point loads well when laid on a properly prepared, level substrate.
- Cavity and flat roof infill: suitable where the assembly is designed for a closed-cell board rather than a breathable one.
EPS is not the right choice for breathable or ventilated wall systems, and it is rarely specified on heritage buildings that rely on solid-wall breathable finishes. For any external wall system, checking the product’s ETA or system certificate, such as the Epsiwall example, confirms the correct fixings and render pairing before ordering.
Installation detailing that protects long-term performance
Most EPS failures trace back to installation rather than the material itself, and practical products like Kurtyny PCV can contribute to energy saving in retrofit projects. Continuity at junctions, window reveals and floor-to-wall interfaces is what keeps the whole envelope performing as modelled.
- Keep insulation continuous at junctions. Gaps at corners, reveals and floor edges are the most common source of cold bridging, and NHBC guidance treats this as a compliance risk, not a minor detail.
- Clear cavities of debris before fixing. NHBC’s superstructure guidance warns that debris left in a cavity during full-fill installation can trap moisture and reduce performance over time.
- Use the fixings and render system specified for that product. Substituting a cheaper fixing or an incompatible render risks water ingress behind the board.
- Fit fire barriers and detailing where required. EPS needs full encapsulation, and appropriate cavity barriers, to control fire spread in the finished wall.
Pro Tip: Ask the installer to photograph junction details before the render or screed goes on. It costs nothing and gives you evidence the insulation was continuous where it matters most.
Environmental and lifecycle considerations worth weighing
EPS is a petrochemical product, so its environmental case rests on lifecycle performance rather than raw material origin. BRE’s certified environmental profiles are the standard route for comparing embodied impacts across insulation materials, and manufacturers who supply data to BRE make it easier to compare products fairly.
- Ask manufacturers whether they hold a BRE environmental profile or equivalent lifecycle data before comparing products on sustainability grounds.
- EPS off-cuts and site waste can often be collected for recycling through specialist waste streams rather than sent to landfill.
- Higher-performance boards such as PIR or phenolic tend to carry higher embodied impacts per unit of thickness, so the comparison depends on the thickness needed to hit the same U-value, not on lambda alone.
Buying checklist: what to verify before you order
A few checks at the ordering stage prevent disputes on delivery and protect the design intent.
- Confirm BS EN 13163 compliance on the datasheet or delivery note.
- Check the declared lambda, density and compressive strength against the design specification, not just the grade code.
- Inspect boards on delivery for damage, consistent thickness and dry storage conditions, since damp or warped boards perform poorly.
- Request CE or UKCA markings, and for external wall systems, ask for the system’s ETA or certificate covering fixings and render.
- Store boards flat and under cover until installation to avoid warping or moisture uptake.
How EPS choices affect Home Energy Model and EPC outcomes
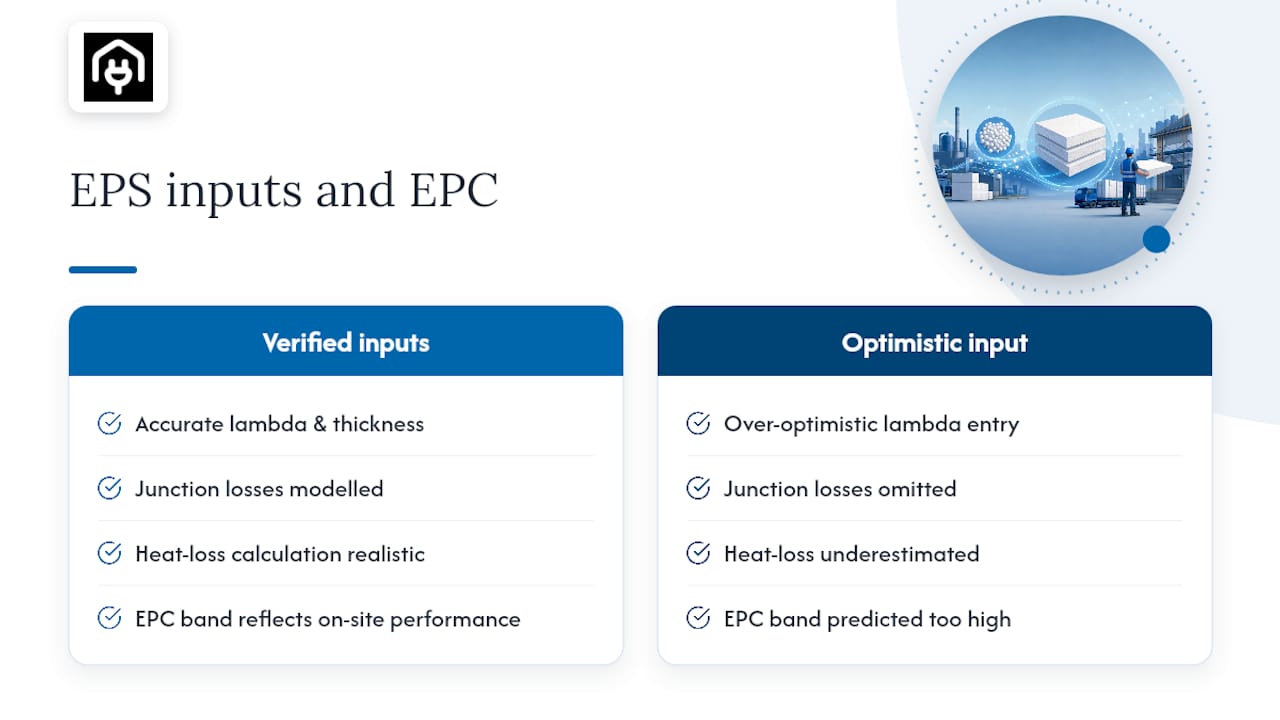
The lambda value and thickness entered for an insulation layer directly shape the heat loss calculation behind a SAP or Home Energy Model assessment, which in turn drives the EPC band. An overly optimistic lambda entry, or a junction loss left out of the model, can skew the predicted rating away from what the building actually achieves on site. Commissioning a proper calculation before or after an EPS upgrade is the surest way to see whether the specification will move the EPC banding as intended.
Why builders still reach for EPS, and when they do not
Builders specify EPS for its cost, its familiarity on site and the speed it adds to an external wall insulation job. When the envelope is thin or the target lambda is demanding, phenolic or PIR often take over instead. Before signing off, ask your contractor about the grade, the render system and the junction detailing plan.
— Danny
How Home Energy Model can help you verify the result
Choosing the right EPS grade and thickness is only part of the process. Confirming that the upgrade moves the EPC band or meets Part L requirements needs a proper calculation rather than a guess.
- A domestic EPC assessment shows the current rating and what an insulation upgrade is likely to change.
- Standard Assessment Procedure calculations model the exact board thickness and lambda you plan to specify against Part L targets.
- Commercial projects can use Simplified Building Energy Model calculations or Dynamic Simulation Modelling for more detailed assessments.
If you are planning an EWI or floor insulation upgrade, request a quote for a SAP or HEM calculation before you finalise the spec, so the EPC outcome matches what you expect on paper.
Sources
- Approved Document L: Energy and greenhouse gas emissions (2026)
- BEIS – SWI innovation final report
- Part L 2013 – where to start: masonry construction – NHBC
- BRE: Certified environmental profiles
FAQ
Is expanded polystyrene good for insulation?
EPS is a widely used and cost-effective insulation material, particularly for external wall insulation, ground floors and some roof applications. Its performance depends on correct grade selection, thickness and installation detailing rather than the material alone.
What are the disadvantages of polystyrene insulation?
EPS needs full encapsulation and appropriate fire barriers because it is combustible in its raw state, and poor junction detailing can create cold bridges that undercut its rated performance. It is also unsuitable for breathable wall systems and most heritage building finishes.
Are polystyrene boards good for insulation?
Yes, provided the grade, density and compressive strength match the application, EPS boards perform reliably in external wall, floor and some roof build-ups. Checking the datasheet’s declared lambda and confirming BS EN 13163 compliance protects the expected result.
Is EPS better than PIR?
Neither is universally better: EPS costs less and is easier to handle on site, while PIR carries a lower lambda value and needs less thickness to hit the same U-value. The right choice depends on available depth, budget and the specific project’s thermal target.